If you notice that your Internet connection is slower than usual or that specific websites are restricted while browsing, it’s possible that your entire Internet traffic is being routed through a proxy server. A proxy server is an essential component of your browser and Internet access.
Let’s have a look at what we need to do to check the proxy server settings on our computer before we go into what they are and how they work. A Proxy Server serves as a hub for all of your web-based operations. Every computer has control over its proxy server settings, which act as a middleman between websites and your computer.
A unique IP address is assigned to you when you buy and set up a computer. The Internet provides data to your computer through an IP address, which is received by your proxy server. This server then relays this data to you, allowing you to view it on your website. Because the proxy server settings is usually controlled by an administrator, you won’t be able to turn it off. Personal PCs, on the other hand, can be made to use a proxy server settings by accident or intentionally.
Check the Proxy Server Settings on Computer
Most browsers on Windows will use the proxy server settings that have been specified on the computer. Each browser offers a page where you may change your proxy settings, but they usually merely link to the Windows settings dialogue. Windows 10 has two ways to change settings: either through the Settings app or through the classic Control Panel. Because you’ll need to use the Control Panel technique for Windows 7, 8, or Vista, I’ll mention both options here.
Windows 10 Settings App
- After that, go to the far left and click on the gear icon (Settings).
- Select Network & Internet from the Settings menu.
- At the bottom of the left-hand pane, click Proxy.
Here you’ll find all of the settings for setting up a proxy in Windows.
- It’s generally separated into two options: automatic and manual proxy configuration.
- In 99 percent of cases, everything should be turned off.
- Your web traffic may be routed through a proxy if anything is switched on.
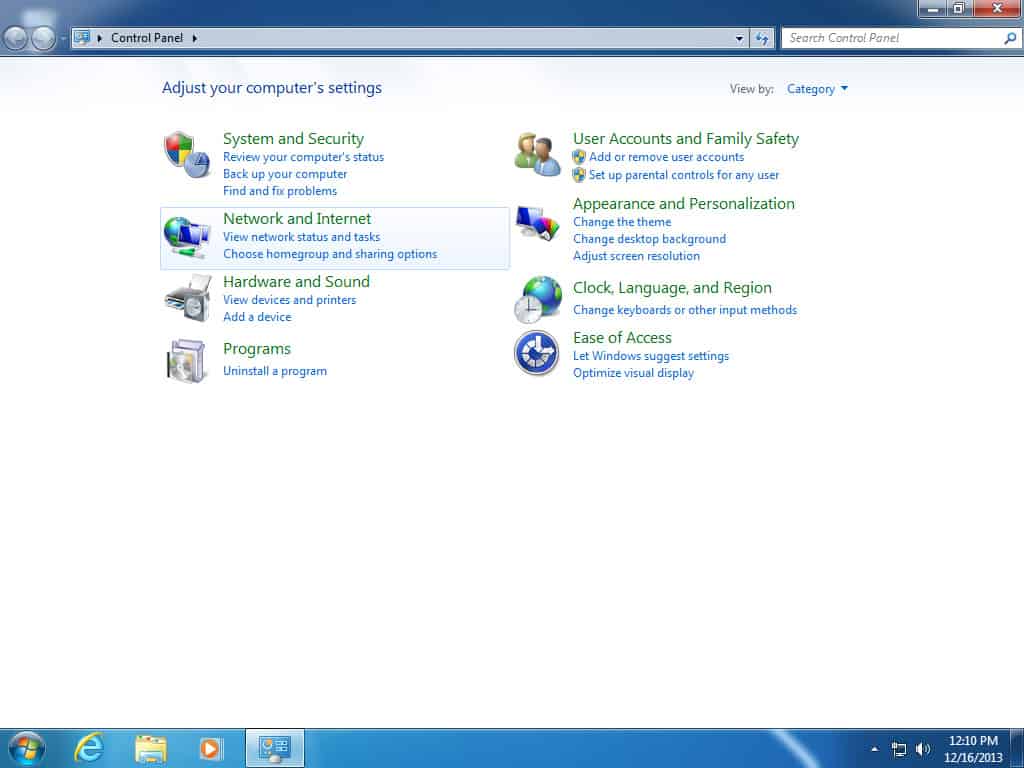
Panel of Control
You can adjust the same proxy server settings via the Control Panel if you’re using an older version of Windows or simply prefer the old way. Note that there is only one set of proxy settings in Windows, regardless of how you alter them.
- Simply select Internet Options from the Control Panel menu.
- Go ahead and click the Connections tab in the Internet Options dialogue, then LAN Settings at the bottom.
- All of the settings in the Settings app are available here as well.
- Everything you set up here will appear there, and vice versa.
- On Mac OS X, look at the proxy settings.
The approach is the same if you’re using OS X on a Mac. Most browsers check the proxy server settings in System Preferences, so you’ll need to adjust them there.
- Select “Network” from the System Preferences menu.
- Make sure the connected or active network connection is selected on the left-hand side.
- Each sort of network connection can have its own proxy settings.
- Click the Advanced button at the bottom.
- You can configure a number of different protocols by going to the Proxies tab.
If you select Web Proxy (HTTP), for example, you will be able to specify the proxy server’s IP address, port number, username, and password.
Manually set up a proxy server
Another option is to manually enter the proxy’s IP address and port number. A proxy server’s address is the same as any other computer on the network, and it could be something like 192.168.1.211. The port can be any number between one and four digits.
Depending on how its administrator (s) established it, it can be any combination of digits, including 80 or 8080. Your company’s proxy server’s IP address and port are provided to you by the network administrator or IT department.
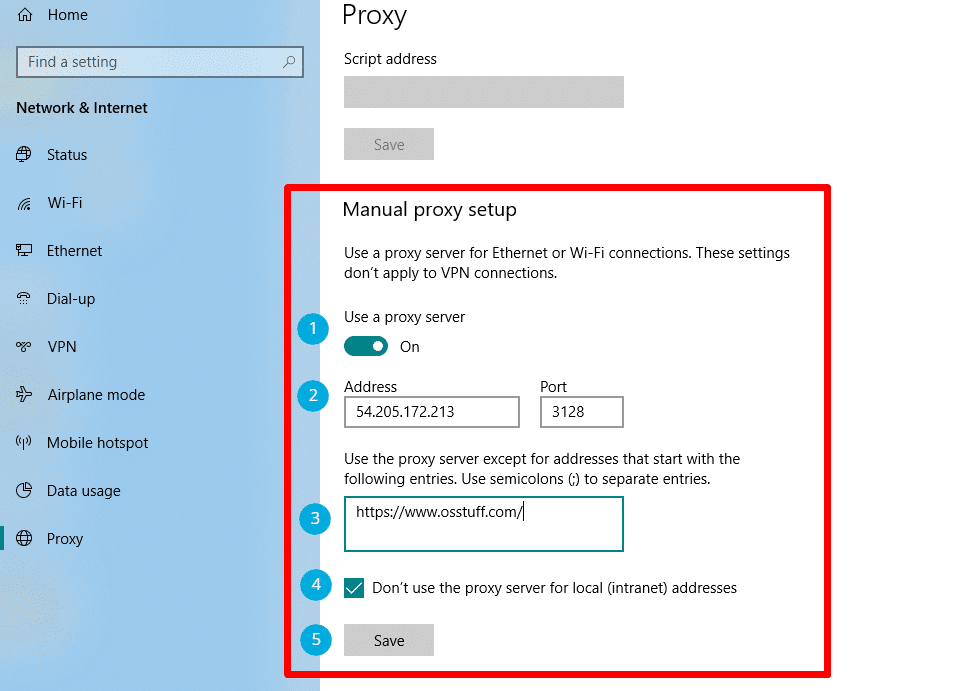
Here’s how to manually set a proxy server settings in Windows 10:
- Open the Settings menu.
- Select Network & Internet from the drop-down menu.
- A list of network and Internet-related configuration settings emerges.
- Select Proxy.
- The available proxy settings are displayed in a list.
- Set the Use a Proxy Server switch to On in the Manual Proxy Setup section.
- Type the IP address in the Address field.
- Type the port in the port field.
- Close the Settings window after clicking Save.
Using an automatic configuration script, set up a proxy server.
Windows 10 is set to automatically detect proxy server settings by default. When you’re linked to your company’s business network, though, this may not function.
One technique to set up a proxy is specifying a script address provided by the network administrator or the company’s IT department. When utilising a proxy server setup script, keep in mind that the address is identical to a URL (website address), such as http://my.proxy.server:8000/.
Follow these steps to set a proxy using an automatic setup script:
- Open the Settings menu.
- Select Network & Internet from the drop-down menu.
- A list of network and Internet-related configuration settings emerges.
- Select Proxy.
- The available proxy settings are displayed in a list.
- Set the Use Setup Script switch to On in the Automatic Proxy Setup section.
- Click Save after entering the script address exactly as it was supplied to you.
- Close the Settings window.
Check the Proxy Settings on Linux
It truly depends on the Linux distribution you’re using. The majority of the time, though, it will be KDE or GNOME. For Linux Mint Cinnamon, for example, which is heavily based on GNOME, you would click the button and then System Settings.
After that, you’d scroll down to Hardware and then Networking. Finally, under Network Proxy, you have the option of selecting Automatic or Manual.
This technique is much the same as for Ubuntu, which uses Unity and GNOME. If you’re using a different desktop environment, things will be different. Please leave a comment if you have any questions. Enjoy!